How to Send Email in Laravel 5.6 using Gmail SMTP

On 7/24/2018 Be the first to comment!

Hi! Today let's see how to send email in laravel 5.6 using gmail smtp server. Since Laravel 5.3, the framework comes with the clean, simple API to send mails quickly via localhost or cloud based service. You can simply use the 'Mailable' class to build your emails.

These classes collect the data and pass it to the view. Any property set as public will be available in the view file. So all you have to do is to set the class property as public and access it via the blade template. You can also send customized data explicitly using the with() method. Please refer the laravel documentation for more details.

send email laravel gmail smtp server

Laravel - Sending Email via Gmail SMTP:

Laravel utilizes the 'config\mail.php' file to store all the mail settings. Here is where you have to configure MAIL_DRIVER, MAIL_HOST, MAIL_PORT, etc.

But you don't have to directly make changes to this file. You can simply provide those details on the '.env' file found in the app root and laravel will automatically find the required settings.

Here go the steps to send mail using gmail smtp server in laravel.

STEP-1) First install the latest version of laravel which is 5.6 as of now. Open up the terminal and fire the below composer command to install it.

composer create-project laravel/laravel laravel_demo --prefer-dist

Here 'laravel_demo' is your project folder.

STEP-2) Next open up the '.env' file and configure the email settings. I'm going to use gmail server for sending the email. So we must provide the gmail smtp details here.

Gmail SMTP Settings:

Host Name: smtp.gmail.com
Smtp Port: 587(tls), 465(ssl)
Encryption: tls/ssl

Your '.env' file should look like this,

MAIL_DRIVER=smtp
MAIL_HOST=smtp.gmail.com
MAIL_PORT=465
MAIL_USERNAME=your_gmail_id
MAIL_PASSWORD=your_gmail_password
MAIL_ENCRYPTION=ssl

STEP-3) Then generate the mailable class. Fire up the below command on the command prompt.

php artisan make:mail WelcomeUser

This will create 'WelcomeUser.php' file inside 'App\Mail' folder. We have created this to send welcome email to user. This class is going to contain only one property which is 'uname'. This member variable represents the user's name which will be passed from the controller.

WelcomeUser.php
<?php
namespace App\Mail;

use Illuminate\Bus\Queueable;
use Illuminate\Mail\Mailable;
use Illuminate\Queue\SerializesModels;
use Illuminate\Contracts\Queue\ShouldQueue;

class WelcomeUser extends Mailable
{
    use Queueable, SerializesModels;
 
    public $uname;

    /**
     * Create a new message instance.
     *
     * @return void
     */
    public function __construct($uname)
    {
        $this->uname = $uname;
    }

    /**
     * Build the message.
     *
     * @return $this
     */
    public function build()
    {
        return $this->view('email.welcome');
    }
}
?>

STEP-4) Next create the view file. This will contain the template for our email. Create 'email' folder inside 'views' and place 'welcome.blade.php' file inside it.

welcome.blade.php
<!DOCTYPE html>
<html>
<head>
    <title>Welcome User</title>
</head>
<body>
 <div>
  <h2>Hi {{ $uname }}! Welcome to KodingMadeSimple.com<h2>
 </div>
</body>
</html>

Above we have a very simple template that displays welcome message to the user.

STEP-5) Next generate a controller file with the below artisan command.

php artisan make:controller UserController

Open the 'UserController.php' file inside 'App\Http\Controllers' folder and add send_mail() function to it. Also make sure to include the path for Mail Facade and WelcomeUser class.

UserController.php
<?php
...

use Illuminate\Support\Facades\Mail;
use App\Mail\WelcomeUser;

...

public function send_email()
{
 $user_name = 'John Anderson';
 $to = 'john.anderson@gmail.com'
 Mail::to($to)->send(new WelcomeUser($user_name));
 return 'Mail sent successfully';
}
?>

Step-6) Finally add route for our UserController's send_mail() function. Open 'routes\web.php' file and add the below route to it.

Route::get('/user/sendmail', 'HomeController@send_email');

Done! Now start the artisan server.

php artisan serve

Open the browser and enter the url http://localhost:8000/user/sendmail and if everything went right you'll see the below screen.
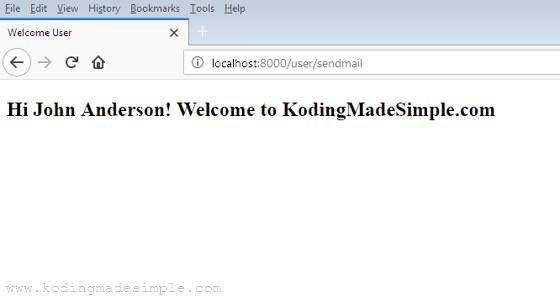
laravel send email using mailable

If you don't receive the email, don't worry. Do the following changes to your gmail settings.

Gmail Settings:

Login to your Google account and go to 'My Account' > 'Sign-in & Security'.

Scroll down to the bottom and look for 'Allow less secure apps' option. If it is set 'OFF', then turn it 'ON'.

Now try it again and you'll receive the mail without any issues.

Read Also:

You can even queue the emails. Just call the queue() method instead of send() with Mail::to. Likewise you can send emails in laravel via gmail smtp. I hope you find this post useful. Please share it on social media if you like it.

How to Install Laravel 5.6 on Windows using Composer

On 6/19/2018 1 Comment so far

Here let's see how to install laravel on windows using composer. Ever since its launch, laravel has become the most popular php framework and not without a good reason. It's a great alternative to CodeIgniter which is another popular MVC for php. Laravel ships with so many goodies out of the box than other frameworks do.

Mastering laravel will definitely take some time, but the time spent is well worth it in the long run. And it will save loads of time in application development. Anyhow, here you are, planned to move on to laravel and want to install it for the first time. Without wasting the time, let's dive into the process of installing laravel on windows machine.

step by step install laravel on windows composer

System Requirements for Laravel:

As of now, the latest laravel version is 5.6. And you have to make sure the below system requirements is met to install and use it on your machine.

  • PHP >= 7.1.3
  • OpenSSL PHP Extension
  • PDO PHP Extension
  • JSON PHP Extension
  • XML PHP Extension
  • Ctype PHP Extension
  • Mbstring PHP Extension
  • Tokenizer PHP Extension

Reference: Laravel website

Prerequisite: Composer

Laravel requires Composer to manage the project dependencies. So before installing Laravel, make sure you have Composer installed on your system. In case you are hearing about Composer for the first time, it's a dependency management tool for php similar to node's npm.

To install Composer on your machine, check this post:

Installing Laravel on Windows:

Follow the below steps to install laravel on windows machine. No matter you have xampp/wamp stack, it works for both. On WAMP, make sure to install laravel on 'www' folder and on XAMPP, obviously the 'htdocs'.

STEP-1) Open 'htdocs' folder on XAMPP, hold SHIFT key and right click on the folder, and choose 'open command window here'. Alternatively, you can open command window and change directory to 'xampp/htdocs'.

STEP-2) Enter the following command.

composer create-project laravel/laravel my_laravel_site --prefer-dist

Here 'my_laravel_site' is the folder name where laravel files will be installed. Change this to your liking.

STEP-3) Now it's time to be patient as laravel installation is going to take some time.

STEP-4) Once installed, change directory to 'my_laravel_site' (cd 'my_laravel_site') on the command prompt and enter the below command.

php artisan serve

STEP-5) This will show a message something like, 'Laravel development server started:' along with an url.

STEP-6) Copy and paste the url on the browser. If things go right, you'd see the laravel welcome screen.

laravel welcome screen

STEP-7) Done! You have successfully installed laravel on windows machine and ready to go with.

Setting Application Key:

Laravel requires little configuration after installation. It requires you to set the application key. This is a random string of 32 characters long used for encrypting session and other sensitive data. Usually this will be set automatically when you install laravel via composer or laravel installer.

In case it's not set, you have to do it manually. First make sure to rename the '.env.example' file to '.env' on your application root. Then open command prompt and change to the laravel project folder. Now run the below command to generate the key.

php artisan key:generate

Copy this generated key to the APP_KEY variable on '.env' file. Save and you are done.

Installing Specific Laravel Version:

The above given method will make composer to download and install the latest version of laravel. If you want to install earlier versions of laravel on your machine, make sure to include the respective version number on create-project command.

composer create-project laravel/laravel=5.4 your-project-name --prefer-dist
Read Also:

Likewise you can easily install laravel using composer on windows. I hope you find this tutorial useful. Please share it on your social circle if you like it.

How to Create and Download CSV File in PHP

On 6/08/2018 Be the first to comment!

Hi! Here we will see how to create a csv file and download it using php. CSV is one of the popular data storage methods used on the Web. Being a modern language, PHP has no problems handling various data formats including csv. It offers native functions to read and write csv files. With fputcsv() method, you can write data as a csv file and force it to download.

Clicking on a file url (link) will just open it in the browser window without downloading. The exe and zip formats are an exception here. But in case you need to download it directly to client's hard disk, then you have to make use of the readfile() function.

Let's see how to do it.

php create download csv file

PHP - Create CSV File:

The following snippet creates a csv file named 'myfile.csv' on your current working directory.

<?php
// data array
$user = array(1, 'Johnson', 'johnson@mydomain.com', 'Miami');
// filename
$filename = 'myfile.csv';

// write to csv file
$fp = fopen($filename, 'w');
fputcsv($fp, $user);
fclose($fp);
?>

Okay! We have created the csv file. Next we'll move on to the download part.

Download CSV File:

As I said before, you must use readfile() along with the proper header to force download of the file. Here's the code to do it,

<?php
// download file
header('Content-type: text/csv');
header('Content-disposition:attachment; filename="'.$filename.'"');
readfile($filename);
?>

Sending the header along with the download option will force open the 'Save File' dialog in the user's browser window.

We have used two header() functions in the above script.

The first one sets the MIME type of the content sent. Since it is 'text/csv' for csv data, we need to set it as the 'Content-type'.

The second line provides the filename to be used for storing and force the browser to display the save dialog.

Read Also:

That explains how to create csv file and automatically download it in php. I hope you find this post useful. Please share it on social media if you like it.

How to use PHP PREG MATCH function to validate Form Input

On 6/03/2018 3 Comments so far

In this post we'll see how to do some basic PHP validations of form input using preg_match() function. One of the vulnerable spot in a website which attracts malicious hackers are the user input forms like registration form, contact form etc. Validating the user input before processing is the first and foremost step in securing the site. The validation includes checking if the data we received is in the right format and length. Generally it's a practice among web developers to do validation check at the client side (like java script). Still it’s easy for someone to break thru it and harm your site. So it's strictly advisable to do these validations on the server side (like PHP).

Generally we receive the form input as string and we can use preg_match with appropriate regular expression to check a required pattern in the input string.

Preg Match Syntax

Before dwelling into the validation process, here take a sneak peak at the syntax of preg match function.

PHP Preg Match Syntax

1. Form Input should contain only alphabets

Say we have a "Name" field in which we want the user to enter only alphabets. Then we can do the checking by this PHP code,

<?php 
     $name = $_POST["Name"];
     if(!preg_match("/^[a-zA-Z]+$/",$name)) { die ("Invalid Name");}
?>

Where in the regular expression, ^ matches the start of the string and $ matches the end of the string. Also "a-zA-Z" is used in the expression to include both upper and lower case alphabets.

The above code checks each character of the string against the regular expression and throws error incase if there is any other character other than alphabet present in the string.

2. Form Input should contain only alphanumeric characters

In case we want a field (eg., "username") to contain only alphanumeric characters then we can alter the above preg_match expression to include 0-9 numbers too.

 
<?php
     $username = $_POST["Username"];
     if(!preg_match("/^[a-zA-Z0-9]+$/",$username)) { die ("Invalid Username");}
?>

3. First character should be alphabet

We can also force a field's first character to be an alphabet. Let’s take the same "username" example. It can contain alphanumeric characters but we want the first character to be an alphabet. The below code will check if the first character is an alphabet.

<?php
     $username = $_POST["Username"];
     if(!preg_match("/^[a-zA-Z]/",$Username)) { die ("Username should start with an alphabet");}
?>

Instead of using the expression "/^[a-zA-Z]/", we can use "/^[a-z]/i" also. Here ‘i’ represents case independent ie., includes both uppercase and lowercase alphabets.

4. Form Input should contain alphanumeric with special characters

What if you want the input field to contain special characters also? Here is an expression that let the string to have alphanumeric characters along with hyphen (-) and space.

<?php
     if(!preg_match("/^[a-zA-Z\-\ ]+$/",$name)) { die ("Invalid Name");}
?>

5. Check for valid Email-ID

The below code will check if the given email id is a valid one.

 
<?php
     $emailid = $_POST["Emailid"];
     if(!preg_match("/^[A-Za-z0-9._%-]+@[A-Za-z0-9.-]+\.[A-Za-z]{2,4}$/",$emailid)) { die ("Invalid Email-ID");}
?>

We have discussed so far some of the common validations we should employ while validating a form. Though it will take a while to warm up with regular expressions, they are quite powerful and using the right expression will do the trick.

Hope you would have enjoyed this article. If you find this one useful, please share it in your circle.

How to Secure Passwords in PHP and Store in Database

On 6/01/2018 1 Comment so far

Hi! Here let's see how to secure passwords in php. Developers have a huge responsibility when handling sensitive user data, such as password. They must take necessary precautions to store the password and other sensitive information in a secure manner. Old-school methods use the md5 algorithm to hash passwords and store them in the database. This really is not safe and vulnerable to attack.

But thanks to the community, PHP 5.5 and higher comes with the password_hash function that generates one-way hash that is extremely secure to store passwords in the database. Below, we will see how to securely hash passwords, store them in the database and verify them against the user given password in php.

php secure password and store in database

PHP - Secure Way to Store Passwords:

If you are a budding developer, these are some things to keep in mind when handling the password.

  • Never store passwords as plain text. It's as good as not having a password at all.
  • Never use MD5 or SHA1 for hashing. They are extremely fast and vulnerable to brute force attack. A powerful GPU could easily break the md5 hash.
  • Never try to make your own password hashing. Someone could easily outrun your smartness putting the system vulnerable.
  • Don't even associate password with encryption, as there is this chance to decrypt which is a big NO. Instead, you must use salted one-way hashing for the password.

So, what to use to protect passwords?

Use password_hash:

With PHP v5.5+, you are lucky to have the built-in password_hash() function, that uses BCRYPT algorithm to hash the password.

The good thing about BCRYPT is that it is very slow compared to md5 and sha1. This makes it computationally expensive to brute force. Plus, you can also change the algorithmic cost factor to make it tougher to break.

How to Hash Password?

To hash the password, pass the password string and the algorithm you want to use for the password_hash.

<?php
$email = mysqli_real_escape_string($_POST['email']);
$password = mysqli_real_escape_string($_POST['password']);
$hash = password_hash($password, PASSWORD_BCRYPT);
$sql = "insert into users (email, password_hash) values ($email, $hash)";
mysqli_query($con, $sql);
?>
The password_hash function will automatically generate a random salt that is cryptographically secure. Therefore, it is strongly recommended that you do not provide your own salt (though you can) for the function.

What should be the length of the Password field?

Be sure to use at least varchar(60) column to store the password hash, since BCRYPT returns 60 characters length string. But you can keep it to up to 255 characters long if you are considerate about future upgrade to accommodate a much stronger algorithm.

How to Verify User Password?

To verify the password, you must use the function password_verify() which will check the password given by the user against the hash created by password_hash. It returns true if the password and the hash match and false otherwise.

Here's the rough usage of the function,

<?php
$email = mysqli_real_escape_string($_POST['email']);
$password = mysqli_real_escape_string($_POST['password']);
$sql = "select * from users where email=$email";
$result = mysqli_query($con, $sql);
if(mysqli_num_rows($result) > 0) {
    $user = mysqli_fetch_assoc($result);
    if(password_verify($password, $user['password']))
        echo 'Valid password!';
    else
        echo 'Invalid password!';
}
?>

If you are using PHP 5.3.7+, use this https://github.com/ircmaxell/password_compat library that helps you to use password_* functions on older php servers.

Read Also:

Guess now you have a clear idea of storing passwords securely in the database with php. No matter how awesome your application, it would be nothing without the proper security measures. I hope you find this post useful. Please, share it on your social circle if you like it.

How to Install Composer on Windows with XAMPP

On 5/26/2018 Be the first to comment!

Now-a-days, many modern php frameworks like laravel, symfony, codeigniter and other libraries use the composer to manage their dependencies. So you need composer to install them on your machine. In case you don't know, Composer is the tool for dependency management in php. It allows you to declare the dependency libraries and packages required for a project and it will install, update and manage them for you. Composer will never maintain anything globally by default but rather on per-project basis.

You need PHP 5.3.2 and above to use Composer. So make sure the system requirements are met before installing it on your machine. In addition, you must also make some changes to the php settings to make it work.

install composer on windows xampp

Change Settings on php.ini:

I hope you have XAMPP installed already on your machine. So before composer installation, do the following changes on your php.ini file.

Go to [path-to-xampp]/php folder and open php.ini file.

Locate the below lines one by one and remove the semicolon (;) from the start.

extension=php_openssl.dll
extension=php_curl.dll
extension=php_sockets.dll

Save the file.

Install Composer on Windows:

STEP-1) First download composer for windows and click on the exe file. This will launch the setup for installing composer on your system. Click 'Next'.

install composer step-1

STEP-2) Next you need to select the path to the php executable file. Just click on the 'Browse' button and select 'php.exe' file. It can be found inside [path-to-xampp]/php folder. Click 'Next'.

install composer step-2

STEP-3) Now a window appears for proxy settings. Just leave it blank for now and click on 'Next' button.

install composer step-3

STEP-4) Finally the ready to install window pops up. Click on 'Install' to start installing the tool.

install composer step-4

Done! Once you finished installing composer, you can check it via command line.

Click on 'Start' > 'Run' dialogue, type cmd and click 'OK'.

On the command prompt, simply type composer and hit enter. If composer is successfully installed on your windows machine, you will see the below screen.

composer command screen

Restart your machine and launch 'XAMPP' control panel and start using composer. The same procedure can be used to install composer for 'WAMP' stack or even if you have installed php separately.

Read Also:

How to Change Apache and MySQL Port Number in XAMPP Localhost

On 5/18/2018 Be the first to comment!

Hi! I'm going to show you how to change the apache and mysql port number in xampp localhost. In case you wonder why you should change the port number of a web server, here is the answer. It's not unlikely for you to run multiple PHP versions on a same machine or to run IIS or JBoss simultaneously with Apache.

When you start a web server, it occupies the default HTTP port '80'. If you try to run the second one, it will fail since the port is already occupied. So unless you change the port for the latter, you can't run more than one web server at once. Below we will see the ways to change the port no. for apache and mysql.

xampp change apache port number localhost

To Change Apache Port Number:

Stop Apache server and exit XAMPP control panel if it is already running.

First you must change the HTTP port.

Go to [path-to-xampp-folder]/apache/conf folder and open http.conf file.

The default port for Apache is '80'. Unless you have changed it, this is the port number you must replace.

Now look for the line,

Listen 80

And then change the port no. to some unused port like this,

Listen 8012

Then search for the line,

ServerName localhost:80

And replace '80' with the new port no like this,

ServerName localhost:8012

Save the file.

Next you must change the SSL port.

Open [path-to-xampp-folder]/apache/conf/extra/httpd-ssl.conf file and search for the lines,

Listen 443
<VirtualHost _default_:443>
ServerName localhost:433

Replace '443' port with something else,

Listen 444
<VirtualHost _default_:444>
ServerName localhost:444

Save the file.

Done! Now restart Apache and access the url http://localhost:8012 on browser. If everything goes fine, you will see the xampp home page.

Please remember to use the port number along with local host to access it. This is not required when you leave apache to run on the default port itself.

To Change MySQL Port:

Just like Apache, you can also change the default port used by MySQL Server which is '3306'.

To do this, go to [path-to-xampp-folder]/mysql/bin/ and open the file my.ini.

Locate the line containing '3306' no. and change it to '3310' or something else and save. Please make sure the new port number is not used by any other service.

You can use 'Netstat' to check all used ports on your system.

That's it. You have successfully changed the default port numbers of apache and mysql server on xampp server. The same procedure can be applied for 'WAMP' and 'LAMP' stacks. For LAMP, you can locate the files on 'usr/bin/apache' directory.

Read Also:

Contact Form

Name

Email *

Message *